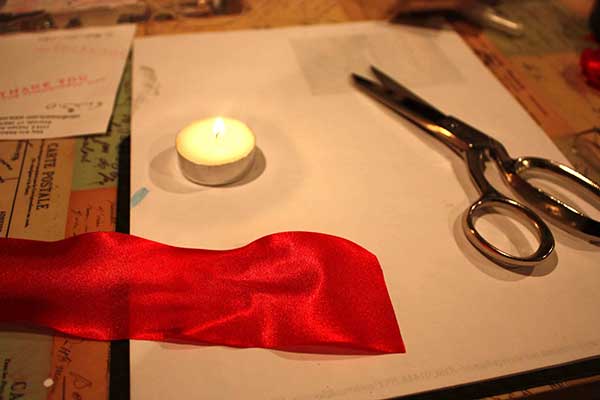
Welcome to the May Arts blog! Today I’ll show you how to make the super trendy burnt ribbon flowers with May Arts ribbon. We’ll start with some of the single faced satin – I used 2”, but it also comes in 1”, 3” & 4” (4” is white or ivory).

Get your supplies- you’ll need the ribbon (about ½ yard per flower +/-), scissors, and a flame- votives work well. Later you’ll also need needle & thread, hot glue & embellishments of your choice (beads, pearls, buttons, etc).
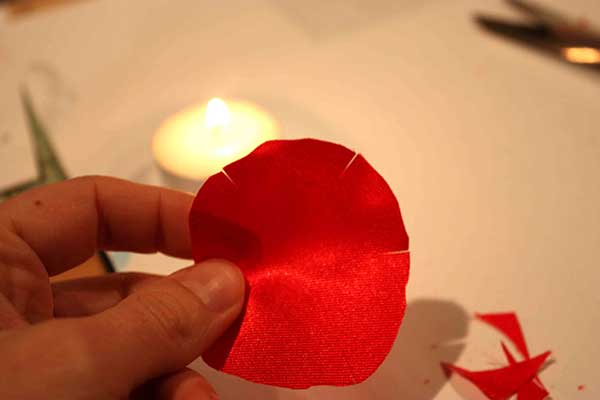
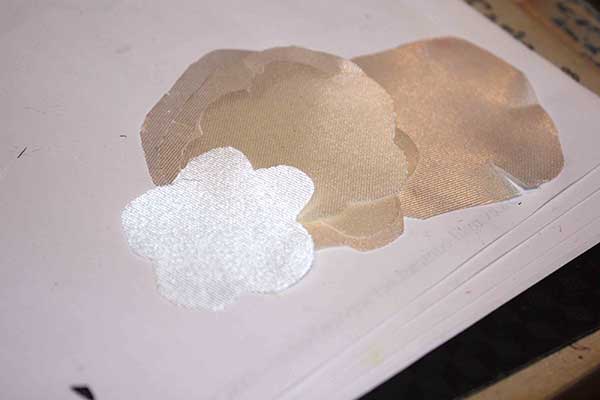
Start cutting circles.
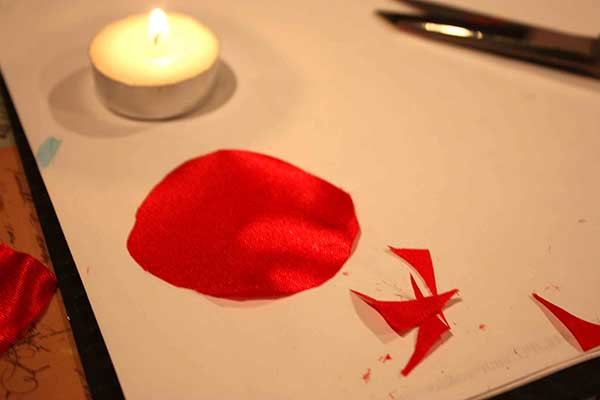
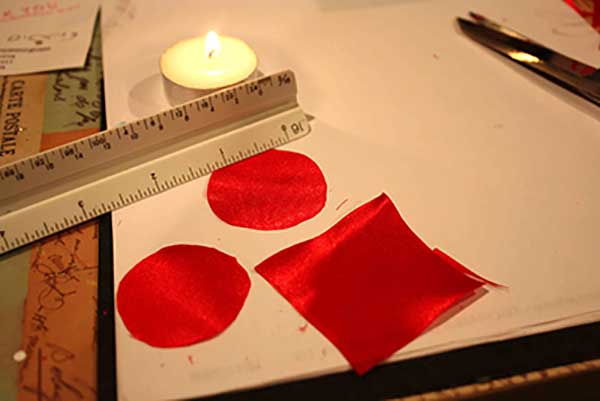
Lots of circles! These DO NOT need to be perfect!!! Some just have the corners rounded, and some are cut into smaller circles. In fact, some I used pinking shears and cut slits for a flower petal effect….

Start burning – CAREFULLY! You don’t need to touch the flame; just get close to it & you’ll see the ribbon start to melt.
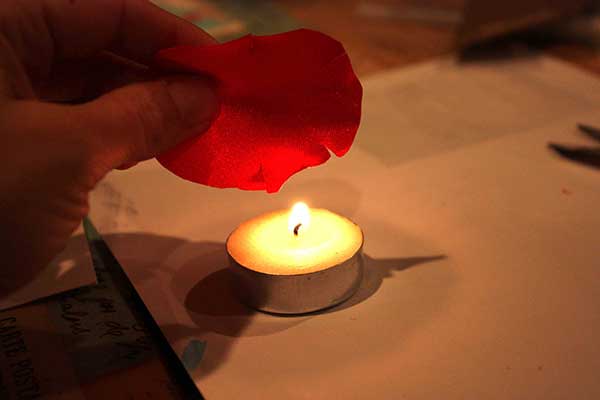
I found if I ‘burned’ the ribbon right side down I had a better result; the ribbon curled IN, which is what I wanted.
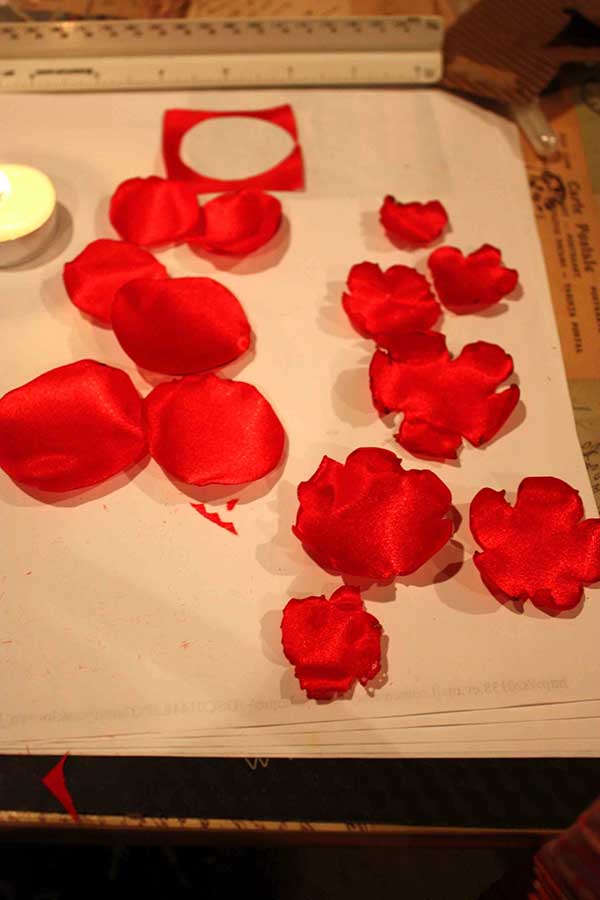
When I had several flowers ‘burned’ I started stacking them up! You can do as few or as many as you’d like – I went with 6 or 7 per flower.
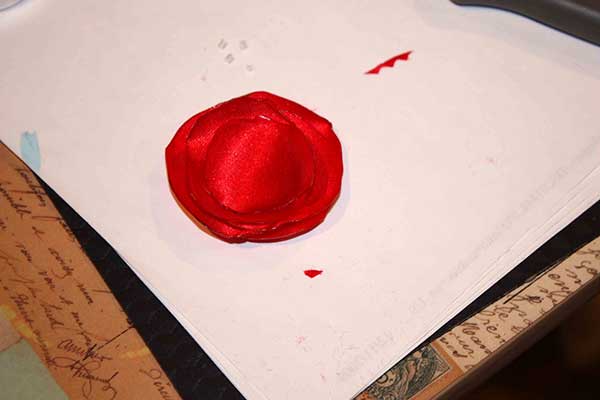
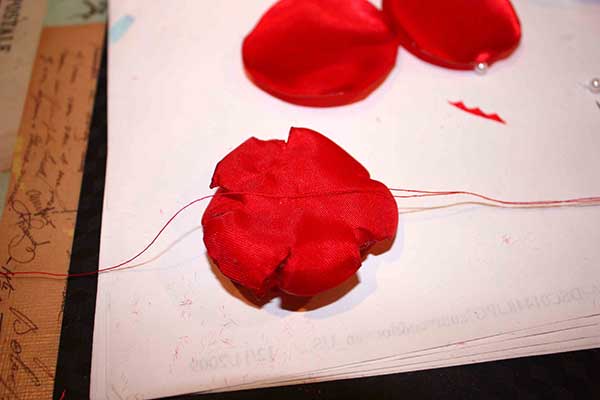
Once you like the order they are stacked, simply sew them together with a needle & thread!
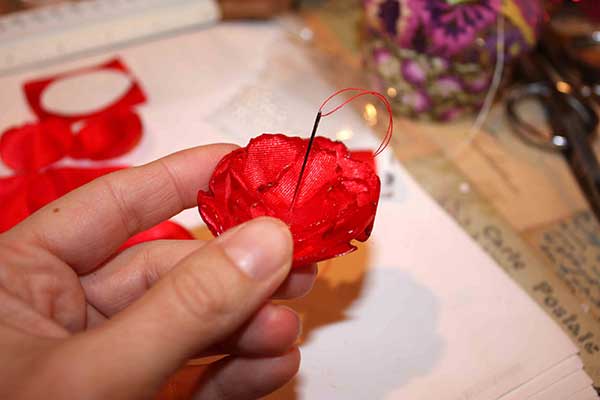
I knotted it a couple of times on the back
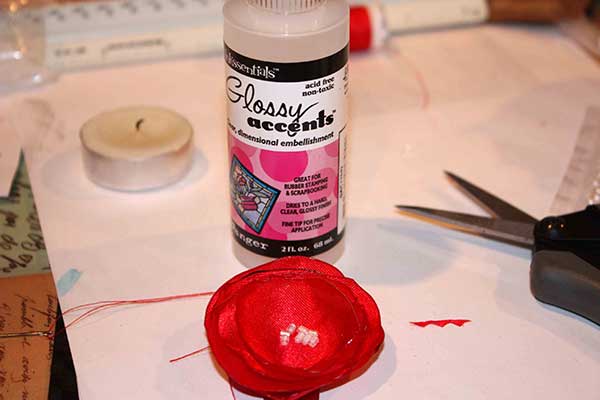
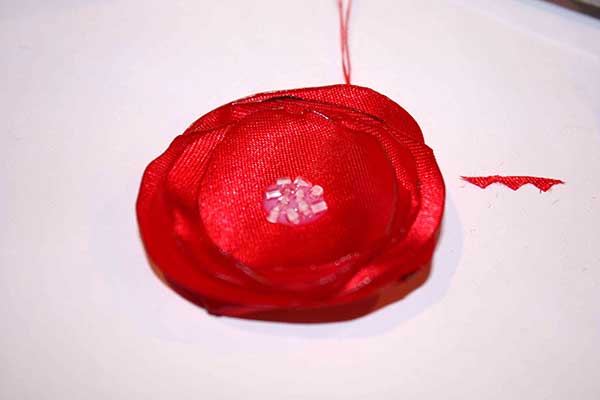
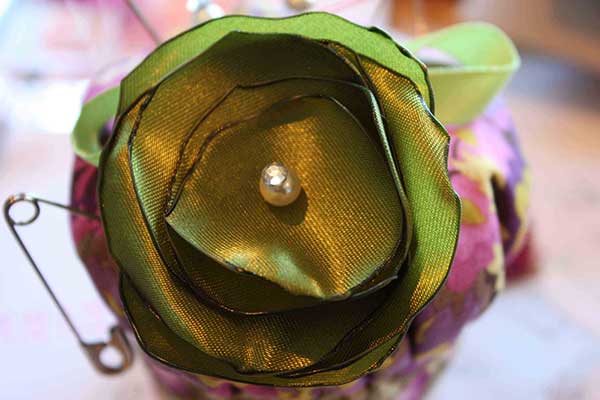
Now you can embellish! I used Glossy Accents as my adhesive & poured a small puddle into the center.
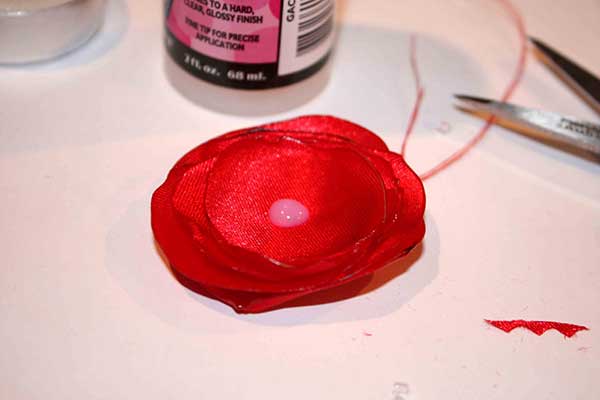
Then I poured in some beads & made sure they had contact with the adhesive!
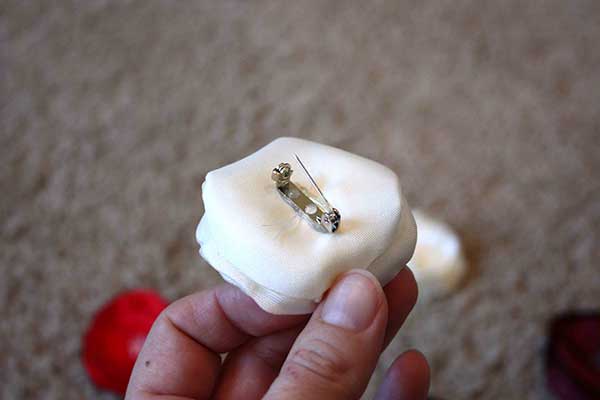
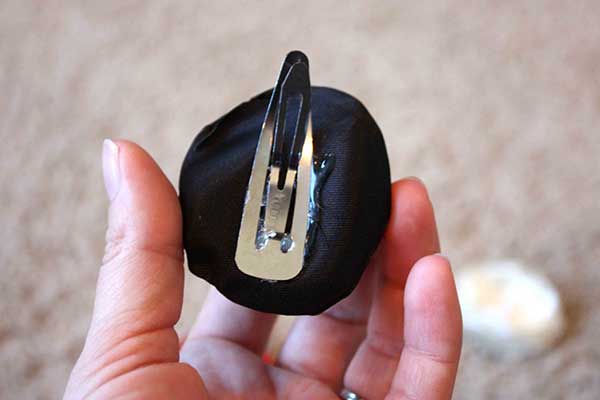
I let the glossy accents dry overnight, and then added pins or hairclips with hot glue
You’ll be so hooked; you’ll want to do lots of colors!
I used a pin cushion to hold them while they were waiting to be sewn together!
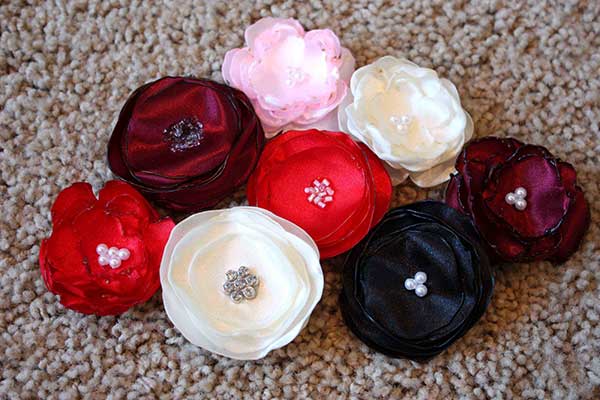
And here’s a beautiful bouquet!
These are great for hairclips, pins, and embellishing cards!!!
I can tell you that not all fabrics will work – the silk IGNITES! (Don’t ask me how I know)
I originally saw the tutorial on these flowers done with fabric by the very talented Emily Jones (a fan of May Arts ribbon!!!), on Jones Design Company.
Thank you for your time with us – I hope you’ve been inspired!
Blog Post By: Jen Shears

its a fantastic work i really like it…….n thanks for sharing
I love this idea. Gotta get me some of that Satin!
These are intimidating at first but fun to make and they all come out so differently so it’s total fun to see how creative you can be!
Just made my first flower… not too shabby, with the exception of it is not centered. Not a biggie. JB (my husband) says it looks great, but he always says such things, lol
Thanks for the tut!! I enjoyed it & look forward to making many more.
~Casey Marie
So stunning, can’t wait to have a go.
Great tutorial – thanks for sharing
I like the slices you put in some of the flower petals. It really adds to the look. Thanks Jen!
Awesome tut! TFS!
Great tutorial. Your bouquet is gorgeous! I just may have to give this a try. Thanks for the inspiration.
Love these! And the tutorial made it look so easy I just had to give it a try. I’ve already made a couple, so much fun. 🙂
oooooh! these are so great. love this idea
Stunning, Jen and a simply wonderful tutorial, too!!
I have always wanted to do these, but been chicken! Beautiful Jen!!!
Love it, so simple yet eloquent!
I am excited to make a bouquet first of the week. We have a busy weekend planned w the kids. Def think this is a mommy craft. I know my girls would LOVE to help, but I think I will keep the ‘burning’ part a secret. Do not want my little trying to make flowers by themselves, we have candles burning a lot in our home. However, the girls wold love to help put them together.
Thanks,
~Casey Marie
These are so much fun to make – I usually burn my finger at least once when I do it though –
What fun!!! Now I need more ribbon. Loved Karen’s great card with the technique.
Great project. I’ll definitely be trying these on future projects.
I’ve been wanting to try this for quite some time-but I’m afraid I will have a disaster! This might help me to get started.
These flowers are gorgeous! I’ve melted ribbon also, on accident!!! Thanks for the tutorial!
The creativity of some people is just downright amazing! This is cool.
Just a thought…I think I might try Punching some circles with a circle punch to make it go a little quicker so I can make more.
Thank you soooo much for sharing the instructions for these. Very Pretty. I know I will be making a lot of these for cards and for my granddaughters hair clips
Very pretty…that large white one with the crystal cluster in the center is gorgeous!
Great idea and they come out very beautiful.
These are GORGEOUS!!!!