Today’s project is so quick, easy and budget friendly; we think you’ll be making dozens of your own in no time.
A recent conversation with a younger relative lamenting the price of ribbon headbands that are lined with velvet was the inspiration for this project.
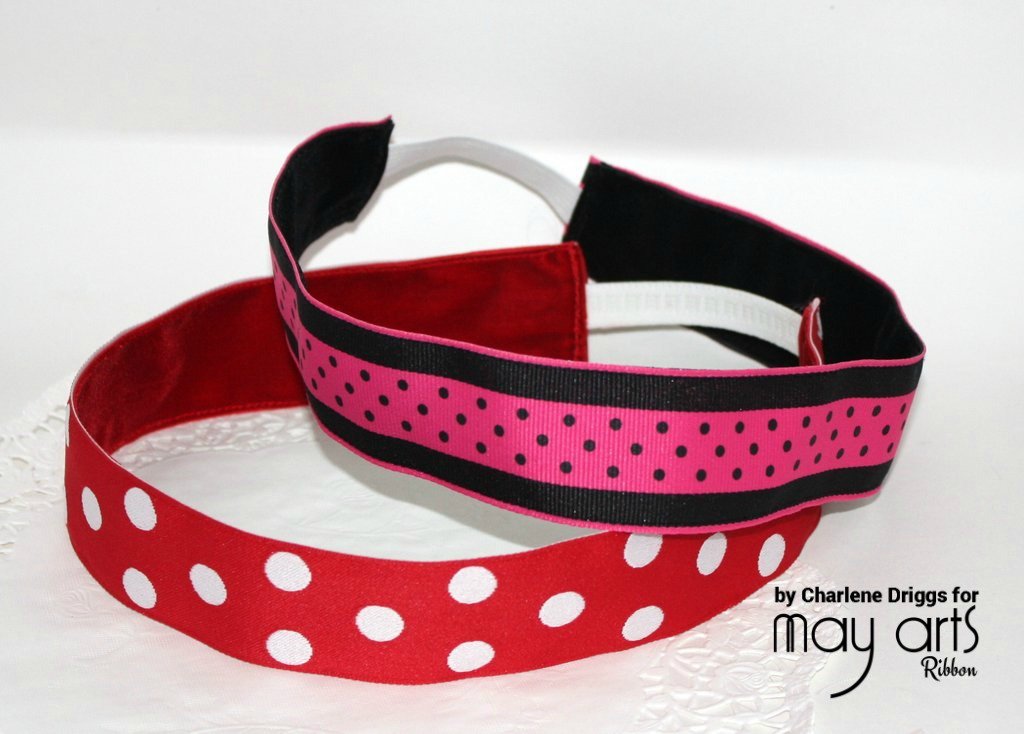
May Arts has so many gorgeous decorative ribbons and beautiful velvets, you can make one of these cute headbands for every outfit in any width and for literally pennies.
Can you see these in our sparkly Glitter Velvet for the holidays?
Here is your supply list for teen/adult sizes:
- 18” May Arts Ribbon – I used 1.5” ED-5-14 & YD-5-93
- 18” May Arts Velvet – PV-5-10/PV-5-14
- 3-4” elastic
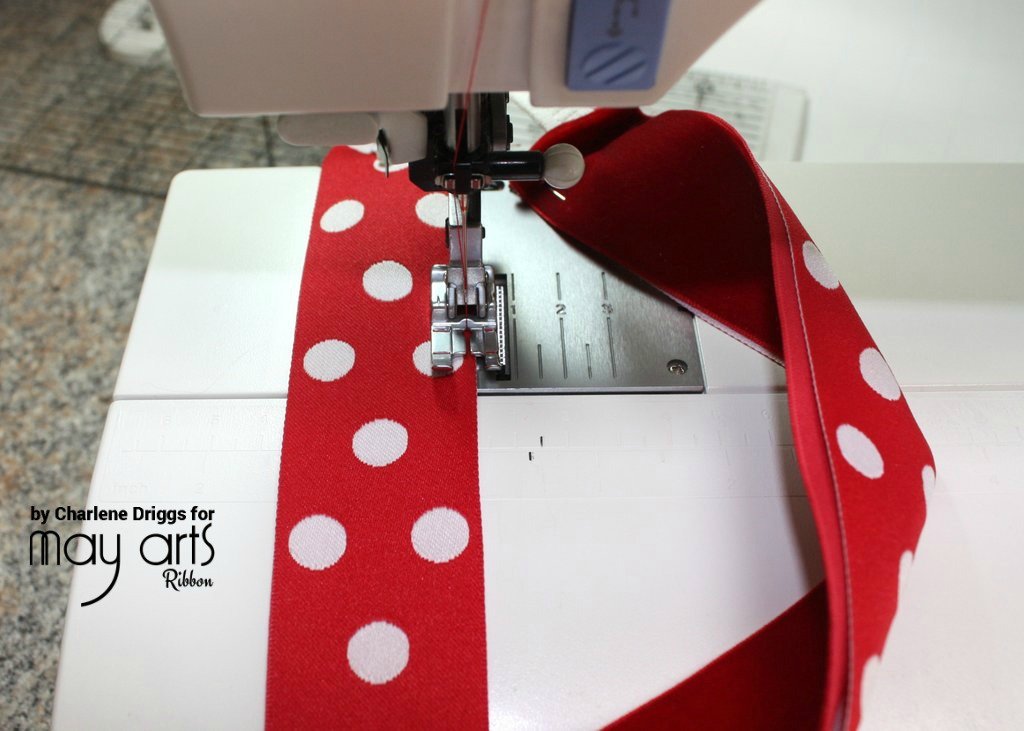
- Sewing machine/matching thread
- Measure and cut your ribbon and elastic. (If making these for a child, measure around the child’s head where you’d like the headband to lie, and then subtract 3”.)
- Fold over a press ¼” on each of the ribbon and velvet.
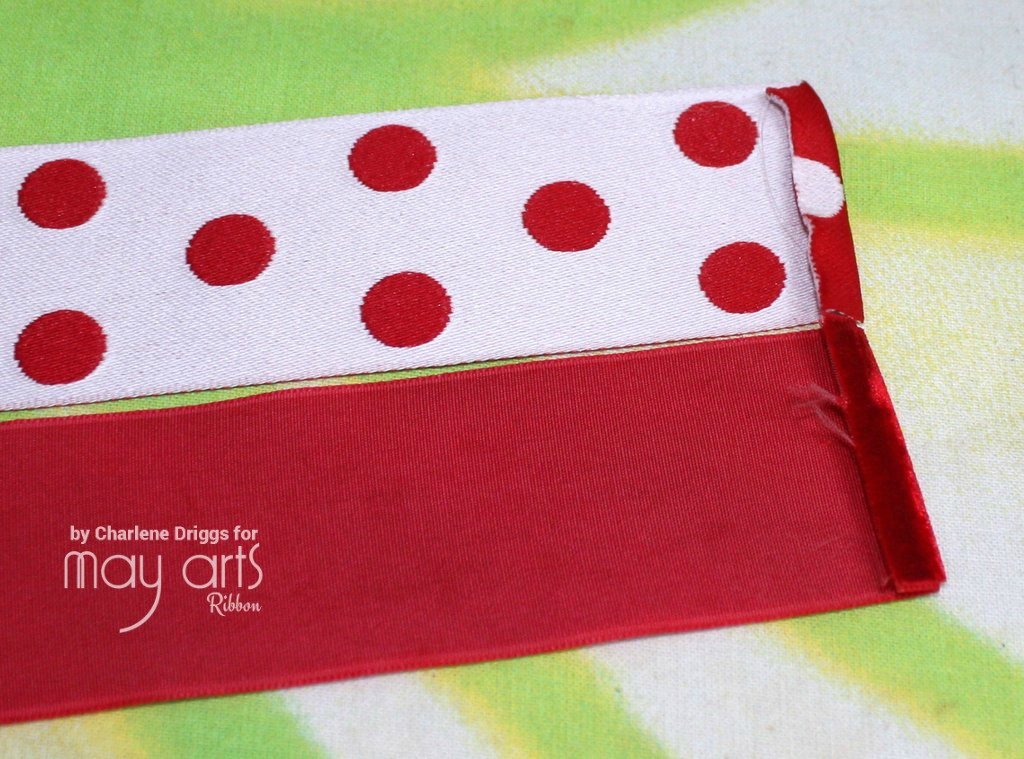
- Place the ribbon and velvet wrong sides together. Pin ½” of the elastic into each end of the ribbons.

- Sew across one end, backstitching 3-4 times to make sure elastic is secure. Stitch down the band close to the edge. If you have a quilting foot it’s helpful but not necessary. Backstitch the elastic once again and finish the second edge.
That’s it, easy, and elegant headbands May Arts style!
We’d love to see your ribbon headbands!
By Charlene Driggs

These are perfectly adorable!