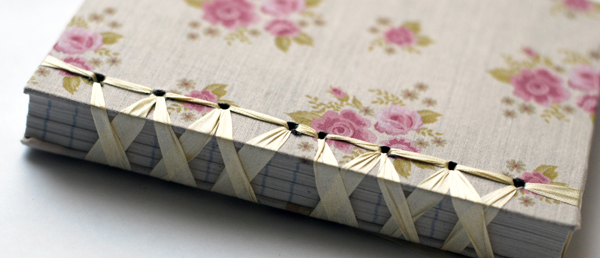
Hi! Tiffin here from Linwood Avenue. About a month ago, I discovered adhesive backed fabric and immediately thought it would be great to use as book cloth. Traditionally, handmade books are very messy and time consuming with gluing and waiting for pieces to dry. This adhesive fabric takes all the mess out of the equation. In this latest tutorial, I will show you how to make a quick and easy handmade book utilizing may arts ribbon as the spine binding. The best part about it is you could easily flip the project to create the ever-elusive left handed notebook.

supplies
– 1 yd – 1/4″ cream silk (SK09)
• DCWV adhesive fabric paper
– 6″x7.25″ & 1.25″x6″ rectangles from one fabric
– 3.75″x5″ rectangle in coordinating fabric
• Mat board
3 pieces cut to: 4.25″x5.5″, .75″x5.5″, .75″x5.5″
• 1 Mead spiral notebook perforated (4″x5.5″)
• Small drill with 1/8” or larger bit
• Scrap piece of wood
• 4 binder clips
• Ruler
• Large needle
INSTRUCTIONS
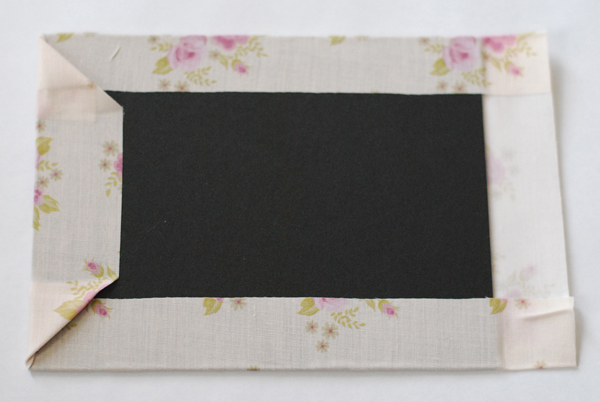
Step 1 –Center your 4.25″x5.5″ board onto the sticky side of the 6″x7.25″ adhesive fabric. Fold the ends into the inside like you are wrapping a gift. Adhere the 3.75″x5″ of fabric on the inside to cover up exposed board. Repeat with one .75″x5.5″ board & 1.25″x6″ fabric.
Step 2 –Tear off front & back cover of notebook. Clip all sheets of notebook together minus one. Carefully uncoil wire spiral & throw away.

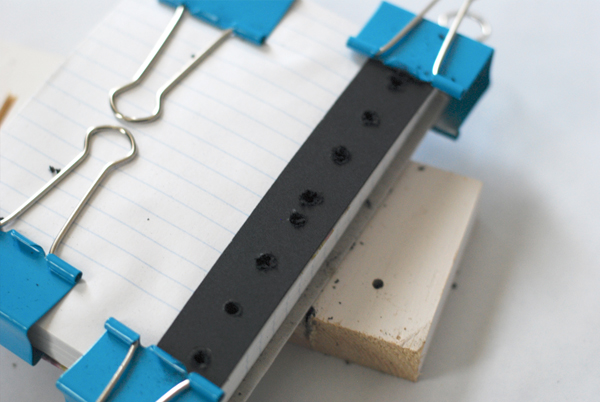
Step 3 –Place spare sheet of paper on top of extra board &mark with a pencil inside every other hole. If you mark 2 side by side holes in the middle, you will end up with 8 marks total.
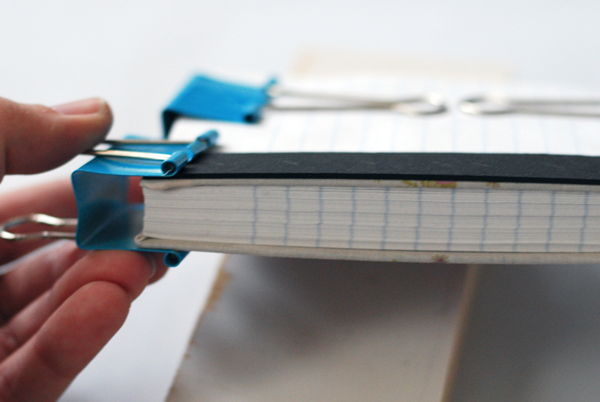
Step 4 –Using remaining 2 binder clips, secure pieces together in this order: 4.25″x5.5″ fabric wrapped board, loose pages, 1.25″x6″ fabric wrapped board, then the extra mat board with pencil marks.
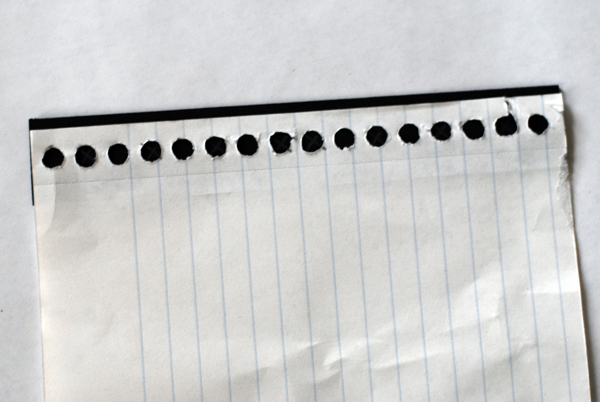
Step 5 –Place your book on top of wood block & drill through all 8 marked holes. You are really only drilling through the sheets of mat board since the pages already have holes in them. The top mat board & wood block will prevent your fabric from getting torn up by the drill. Carefully remove top mat board, discard, & replace binder clips.
Step 6 –Thread your ribbon onto a needle and insert into one of the middle holes leaving a 6″ tail. Continue binding by weaving in & out of holes, pulling ribbon tight. Stitch down & back up one side & then repeat the process with the other side. End your stitching by bringing your ribbon up through the other middle hole.
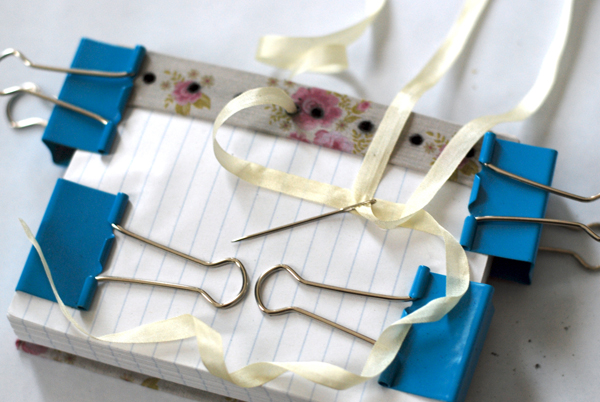

Step 7 –To finish, make 2 knots with both ends of ribbon & then tie in a bow.
Blog post by: Tiffin Mills
Download the tutorial to this project Here!

Amazing Idea its look very pretty.
Thanks for idea.
Great idea by Tiffin! Thank you for sharing it with us.
This is just so cute! How do you do the pattern of the ribbon?
Where would I find adhesive backed fabric? I “googled” it and the search was not positive.
Thanks for the great tutorial.
Hi Rose,
The adhesive Backed fabric paper used for this project came from DCWV. If you google “DCWV adhesive fabric paper” it should come right up. Hope this helps!
Awesome idea, I think I’d try this on a mini-album.. TFS!
That is the perfect ribbon for this project~! Gorgeous!!
I love this idea!!!
The ribbon binding caught my eye, so I headed over from oneprettything.com. What a wonderful tutorial, thanks so much for sharing! I have a stash of fabric scraps which I could mount on sturdy paper (the adhesive backed fabric is insanely expensive here in Germany).
Love this!
Very Pretty!! I sure wish it would snow here in NC!
this is really amazing ! I may try doing it with a twist and just use beautiful paper and seal it really good, then figure out a way to do the holes without a drill. This has inspired me alot !
since the holes are already in the paper, you really only need to make holes in the front and back cover. a good hole punch could be your best friend!
I go for amazing, too! like Kathy just said. Thank you for a great idea!
Amazing. Love the sticky back fabric and the picture tutorials! Thanks so much for sharing.
Love this idea and such a nice looking book. Will definitely give this one a go. Also, love that fabric! Thanks for sharing the tutorial.
I totally love this idea! I so have to make some of these!
very nice book/journal. it is fun to make a handmade book for someone.
***I really like your new blog look***
stamping sue
https://stampingsueinconnecticut.blogspot.com/
I’ve used the fabric to do cards and rosettes but never thought about books. I love the ribbon binding. Thanks for sharing.
Love it. Great instructions! Thanks.
This is a wonderful very professional looking notebook idea! Thanks for the idea and the great tutorial.