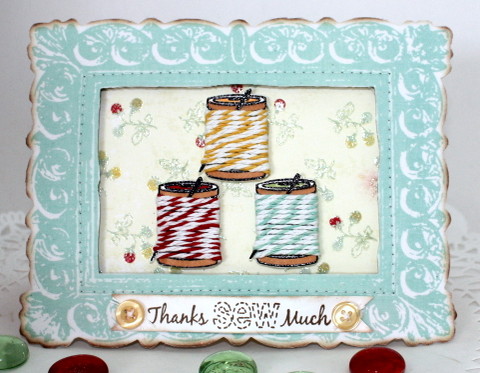
Make Your Own Twine Card
Hi and welcome to the May Arts blog! If you’re new here, take time to look around! The Design Team has lots of projects to inspire you. If you’re a regular, we hope you’ve come to love May Arts Ribbon and the ribbon inspiration you find here every day as much as we do!
Today, I’ve created a fun and simple card using a few of the 9 beautiful colors of baker’s twine May Arts offers.
Isn’t this fun? It looks like a framed photo that would be a perfect way to thank a sewing friend.
Here’s the Supply List:
- May Arts Baker’s Twine 412-27, 412-18, 412-14
- Paper – Card base Neenah 110 lb. cream; the DP was a gift so I’m not sure of the manufacturer
- Ink – Versamark; Versafine Sepia; Copic markers
- Stamps – Sparkle N Sprinkle Sew Fabulous (461)
- Other – Little Yellow Bicycle Elizabeth Park Fabric Frames; Helmar Zap Dots; Papertrey Ink Banner die; SNS Black Detail embossing powder; heavy thread; buttons; sewing machine; heat gun; glue dots
Here’s how to do it:
- Cut card base 4 ¼” x 5 ½” with crease at top. Stitch around the interior of the LYB frame with sewing machine. Sponge the edges with Sepia ink. Attach designer paper to card front. Attach Zap Dots to the back of the frame. Peel the dots and attach the frame to the card base.
- Stamp the spool image in the set 3 times with Versamark ink. Sprinkle with embossing powder; heat to melt. “Fussy cut” the spools. Color the ends with a tan Copic marker and the tops with Copic markers to match the twine colors. Wrap twine around the spools. Attach spools to card front with Zap dots.
- Die cut banner die. Stamp with sentiment. Thread buttons with heavy thread. Attach banner to card front. Attach buttons with glue dots.
Thanks for joining us on the May Arts blog. I hope I’ve inspired you to use twine in a different way. Come back tomorrow for more May Arts Ribbon inspiration!
By: Charlene Driggs


