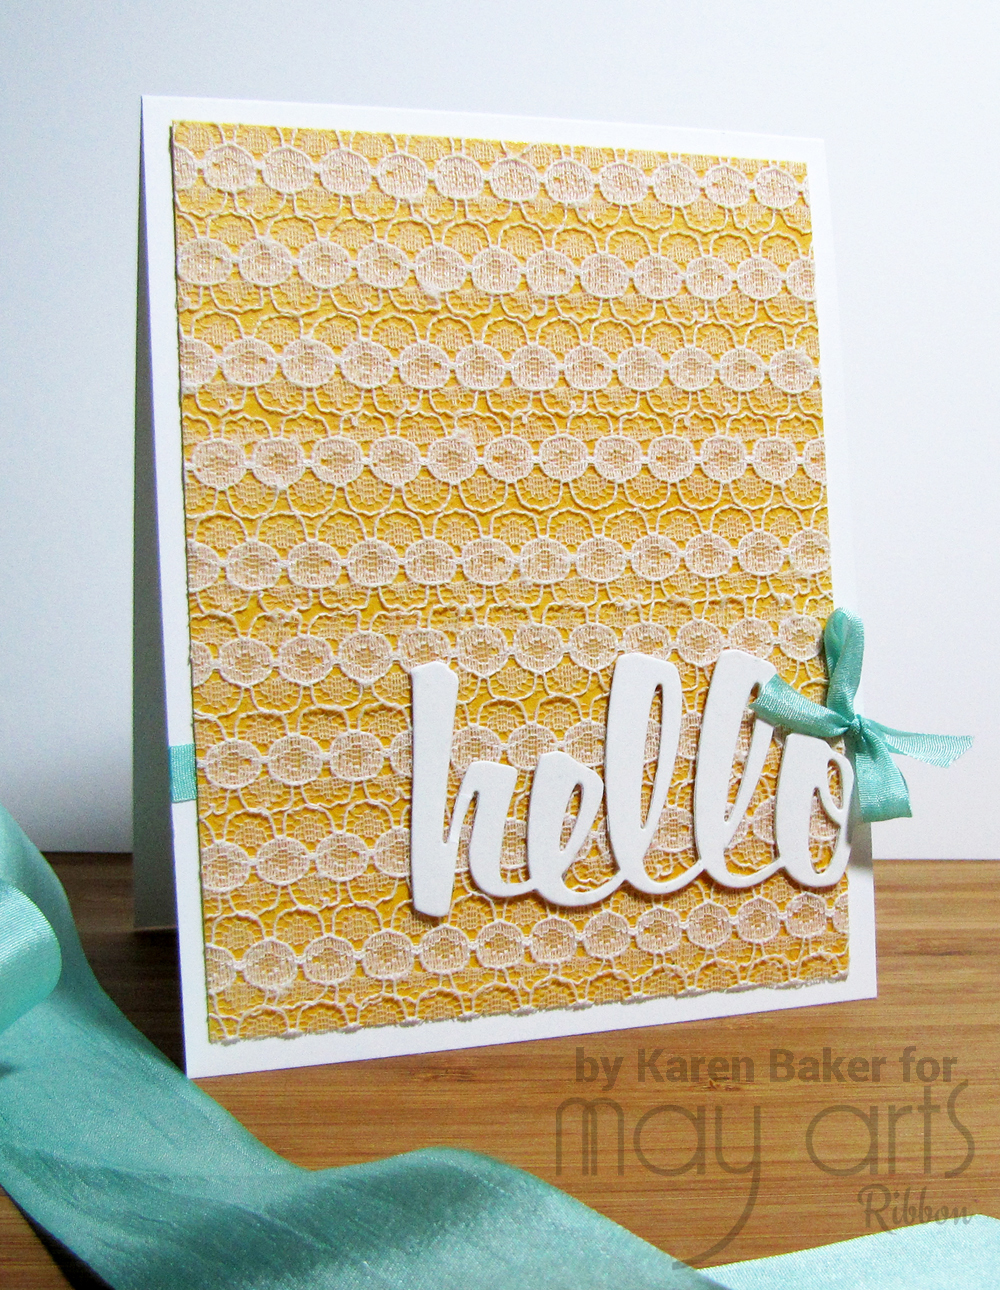
There’s just something about receiving a custom handmade greeting card, especially when it features a beautiful, textured background of lace. I really enjoy creating cards that are easily mailed but still have the components of texture and depth. I created a custom background panel using May Arts Lace for my card today, and it was so simple to do!
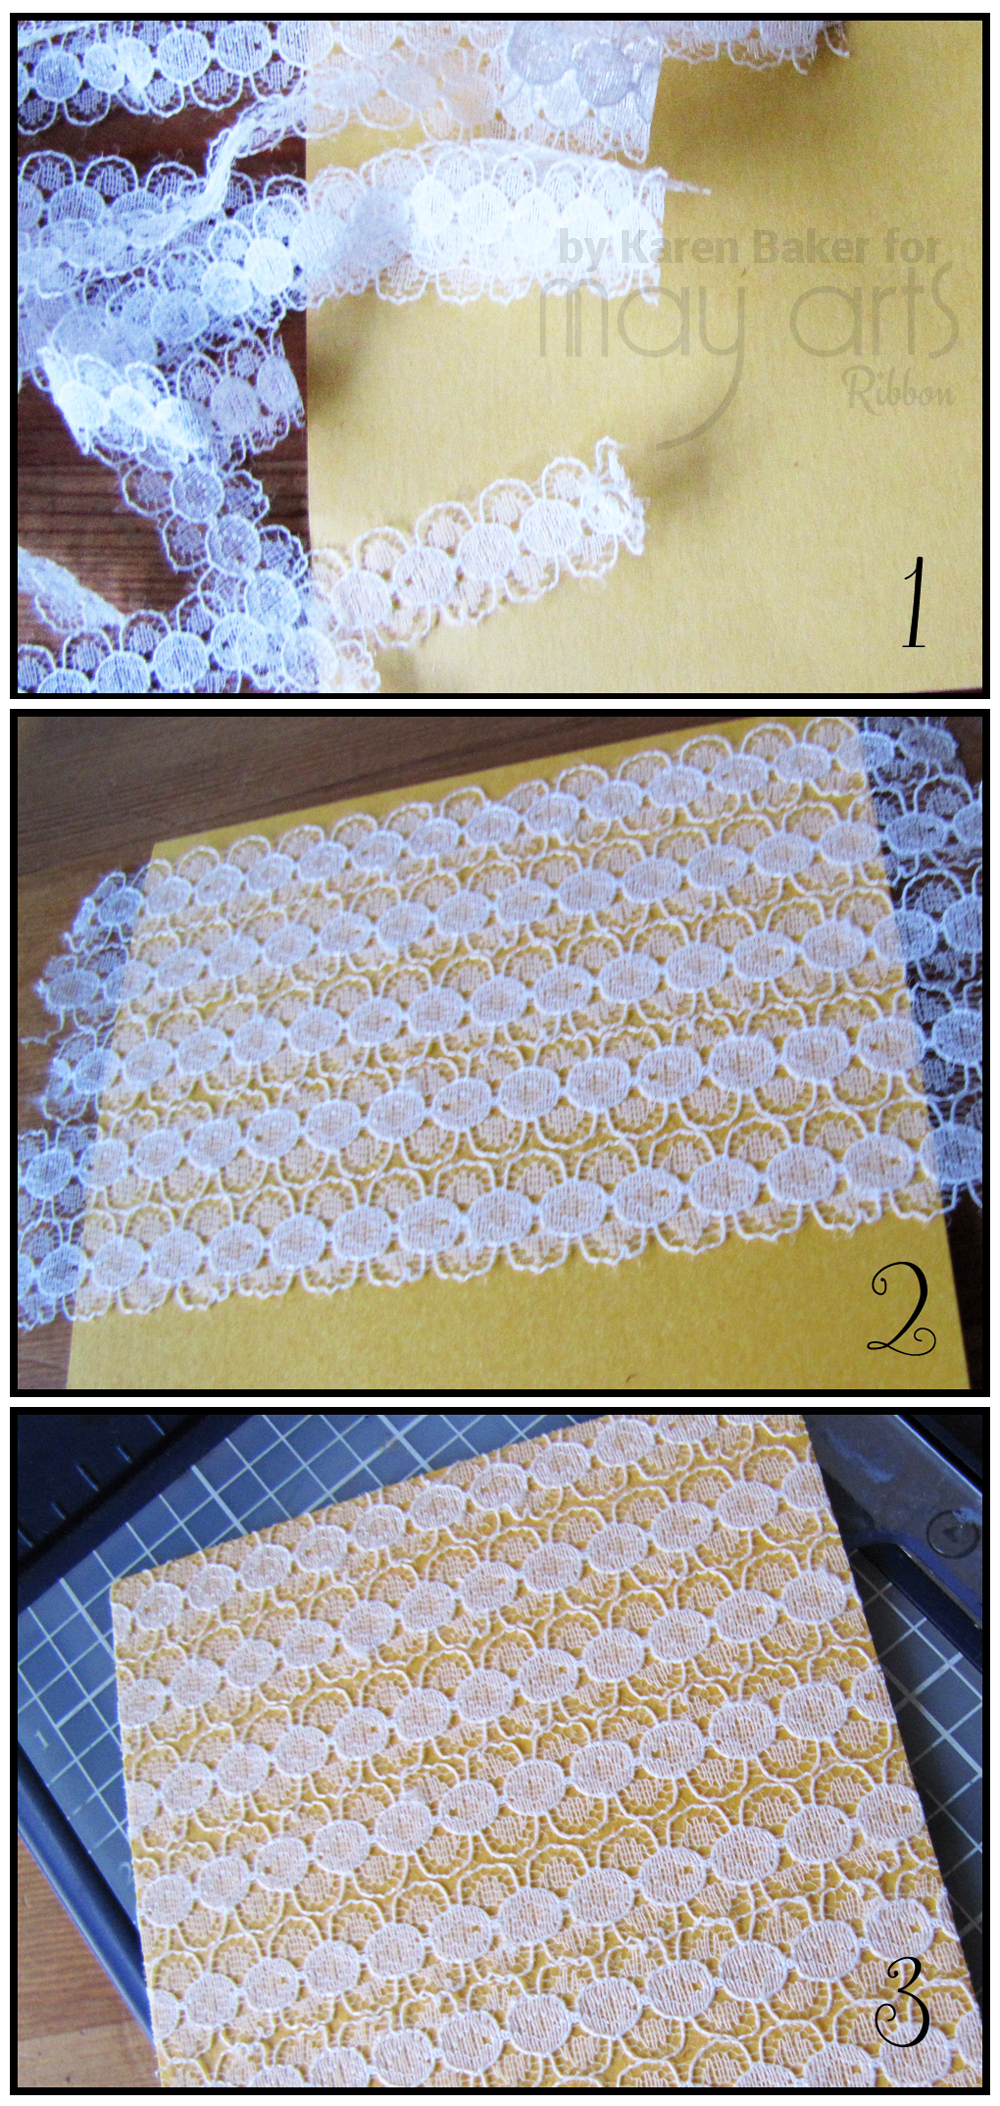
- I cut a panel of solid cardstock and enough strips of May Arts Lace Ribbon (390-58-09) to fill a standard A2 cardfront.
- I then sprayed adhesive lightly over the cardstock and layered the lace in strips over the cardstock, being careful to not overlap each piece.
- Finally, I trimmed the custom lace cardstock panel to the desired size. The lace is delicate enough that it withstood the guillotine cutting, but sturdy enough to stay in place!
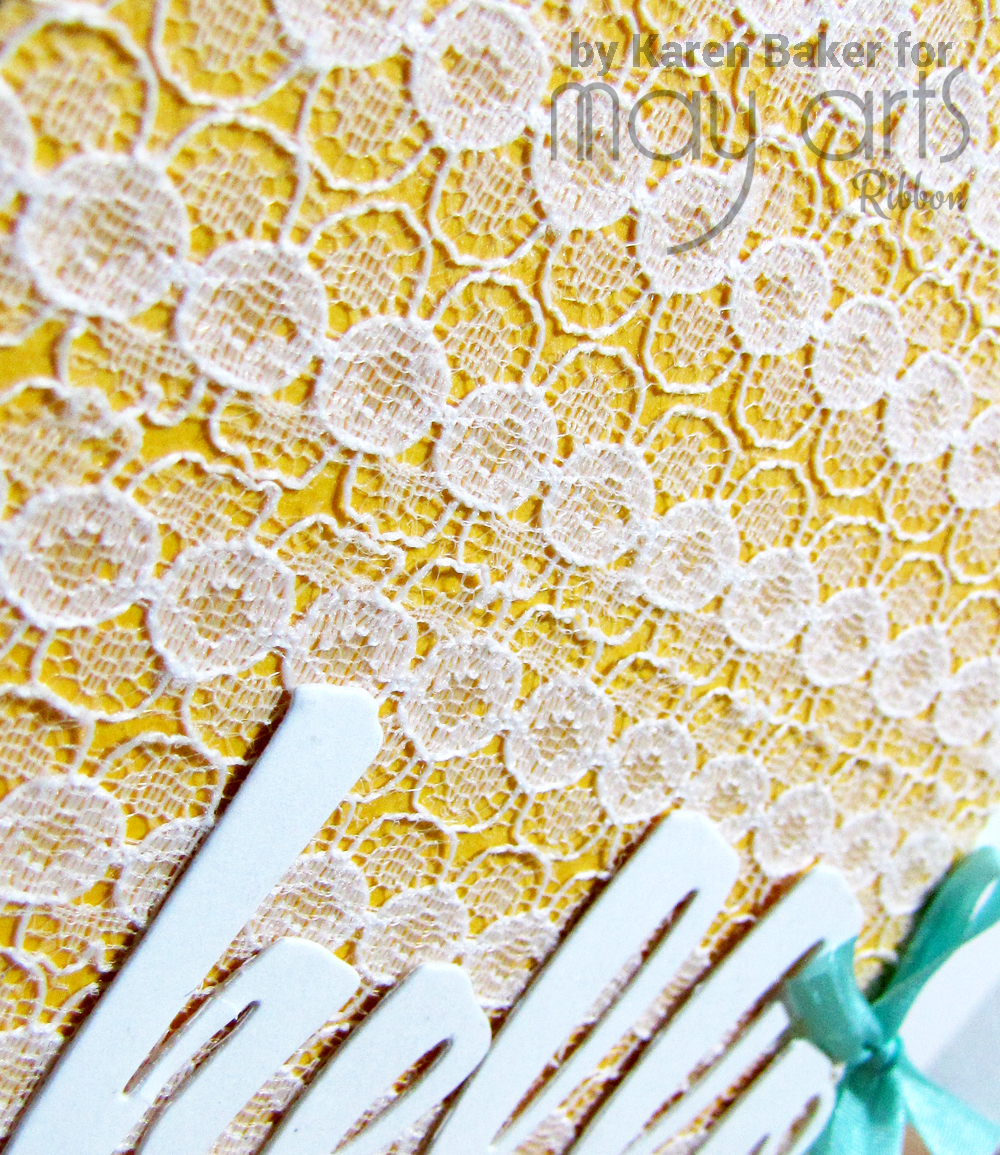
I finished the card with a die-cut greeting adhered to the lace panel. Before attaching the lace panel to the card base, I wrapped it with ¼” May Arts Robin Egg’s Blue Silk Ribbon (SK-14-94) and tied a bow on the side. I then adhered the lace panel to the card with glue! I adore the beautiful and delicate textured background that the lace created, and it is so much better to touch and feel the card now instead of using patterned paper! The end result is even flat enough for mailing without extra postage!
I can image the different feel of this style card just by changing out the color of the cardstock panel and silk bow…black cardstock with a red bow for an elegant feel, kraft cardstock with a green bow for a natural feel…you could even customize the colors to coordinate with your friend’s or family member’s wedding party!
By Karen Baker
Other Supplies Used:
- Tombow Mono Multi Liquid Glue
- Bazzill Card Shoppe Cardstock
- Lil’ Inker Designs Hello Word Die

DELIGHTFUL card Karen!!!
I have never used spray adhesive before and wonder if you had to be super fast securing your lace strips in place before it dries? Also, do the spaces in the lace remain sticky on the cardstock base?
THANK YOU for sharing!!!
Hi Tracy! Thank you for your nice comment. No, the adhesive that I used does not dry immediately, so there was a little bit of wiggle room, although you do have to work fast enough. And no, I could not feel any adhesive come through the lace. May Arts lace is of such super great quality that I didn’t have to worry about it falling apart and the weave is nice and tight. I did not spray heavily either, so that helped out as well for not having the adhesive come through. Try on some scrap paper first! I bet you will love the results!