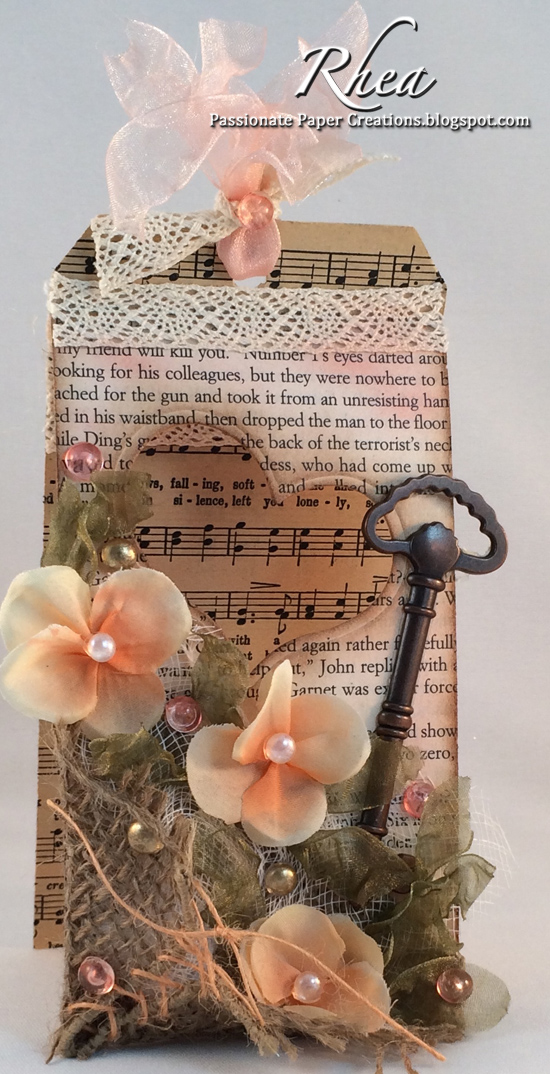
Hello Rhea here to share a vintage Valentine card made from two tags. Of course I’ve included flowers with lots of texture.
Let me share how fun and easy this project is. 🙂

- Take two tags and cover one with book page and the other with sheet music. You can also choose to use your favorite pattern paper to make your own tags.
- Die cut cut a heart from the center of the top tag.
- Fold the top (book page) tag ¾” down from the hold punch and fold
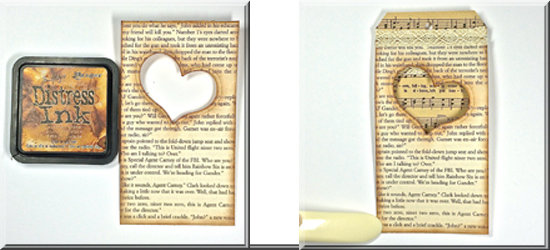
- Ink the edges of the top tag (book page) with Distress Ink in Vintage Photo.
- Adhere the top tag to the bottom tag with adhesive. I found it easiest to line up the bottom edges.
- Decorate the seam with vintage lace ribbon.
Now it’s time to decorate:
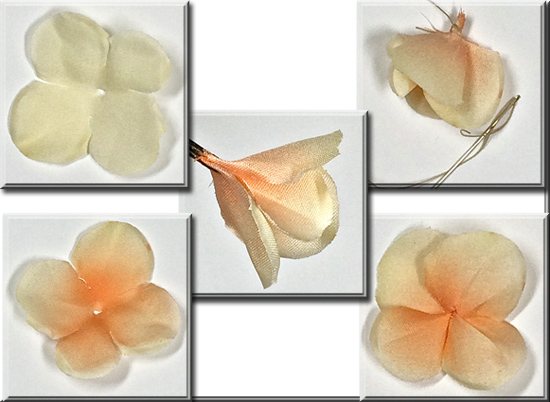
Here I’ve used a flower from 3/4 inch Box of Flowers.
- I air brushed the center with Copic Marker. You can spritz or color it however you like. They also come in several colors.
- Fold all petals to the center and twist
- Sew the center into place. Make sure it is tight.
- Unfold and shape petals into place.
To finish decorating this piece…use burlap ribbon in the lower corner. Fold over the edges to make a corner and lace up with burlap string.
Leaves were made with sheer ribbon shaped and heated with a heat tool.
Dew Drops were used as flower centers and accents as well as a metal key from my stash.
Also used was a little cheese cloth to add addition texture and soften and fill.
By Rhea Weigand
Partners In Craft Supplies Used:
- Scor-Tape – Scor-Pal
- Hearts One – Spellbinders
Other Supplies Used:
- Vintage Photo – Distress Ink by Ranger
- Copic Markers
- Dew Drops – The Robins Nest
- Metal Embellishments – are from my stash
- Cheese Cloth from my stash – first aid gauge
