How To: Ribbon Wrapped Writing Pens
How many times does the phone ring, you need to take a message or write something down, and can’t find a pen? I have lots of pens in my house, but can never put my eyes on one when I need too. Well, this crafty project will hopefully solve that problem because I’m going to show you how to create decorative pens that will stand out wherever they are.
Here’s what you’ll need to make these lovely pens:
- Assorted May Arts Ribbon—narrow ribbons work best for wrapping your pens. And, this is a great project to use up some of your scrap ribbon. See photo at the end of the post for specific ribbons used.
- Hot Glue Gun
- K & Company Adhesive Pearls
- Doodlebug Design Mini Jeweled Adhesives
- Writing Pens—you’ll want to use pens that are perfectly round, without beveled edges.

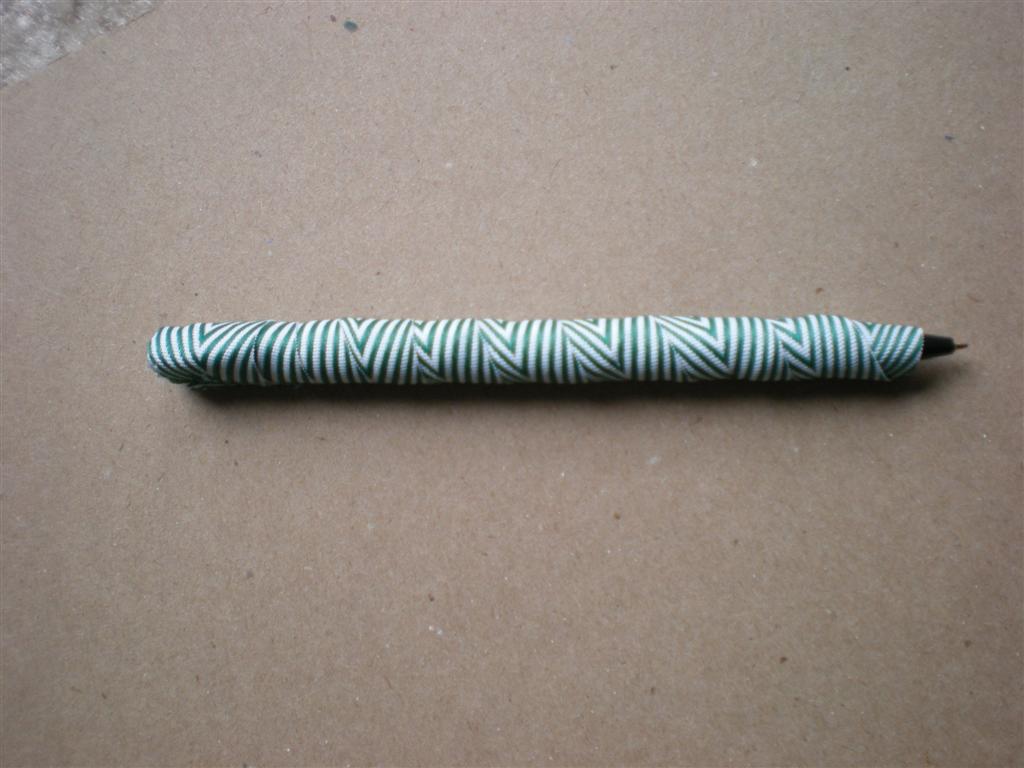
Step 1: Starting at the top of your pen, place a small dot of glue. Attach one end of the ribbon to the glue.

Step 2: Run a straight line of glue down the side of the pen and begin wrapping your ribbon diagonally around the pen. I found that it worked best if I glued and wrapped in 2” sections. It gave me more control and allowed my glue to stay hot as I worked.

Once you’ve wrapped all the way to the end of your pen, change directions and begin wrapping back up to the top. You can use small dots of glue along the way to keep your ribbon in place.
Step 3: Once your ribbon is back at the top of your pen, glue the end down.
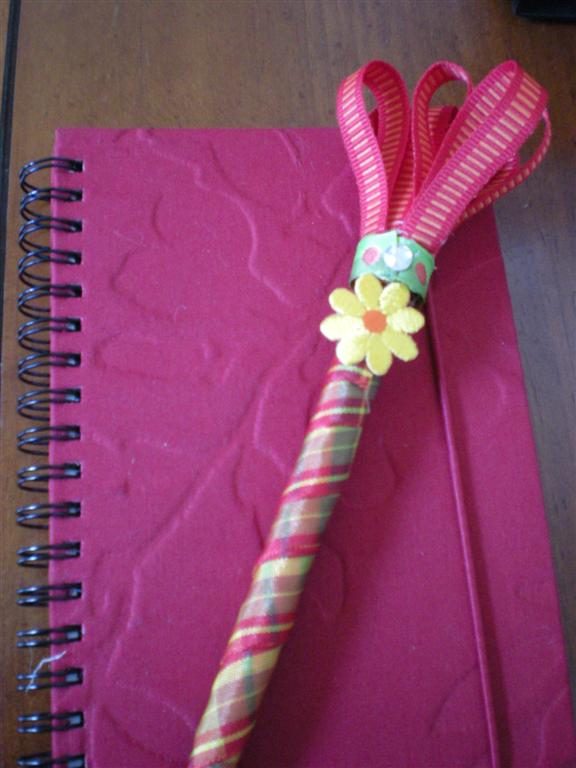
Step 4: Now you’re going to create the flourish for the top of your pen. Cut six pieces of ribbon measuring 4” long. Glue the ends together to form a loop.

Step 5: Once all six of your loops are created, place hot glue around the top of your pen. Place three of the loops around the top.

Step 6: Now, place a small line of glue between each of your first loops, and add another loop. Your loops will be overlapping each other and will give you a full look.

Step 7: Now cut a 5” length of ribbon to wrap around the base of your ribbon loops and glue it into place. This will cover the exposed ends of your ribbon.
The last step is to add a pearl or jeweled embellishment to the exposed end of the wrapped ribbon.
And there you have it, beautiful Ribbon Wrapped Writing Pens!

Pen 1: 382-34-15, SD46, 373-58-09
Pen 3: AB17, SD67, SD64, SD44, SD20
Pen 7: TR67, SD64, SD27, SD67, SD05
And here’s a pen holder I made to hold all of my pens.

Thanks for joining me today. I hope you enjoyed this project.
Blog Post by: Shelly Dozier-Mckee