Tutorial for Ribbon Storage Ideas
The crew at Piggy Bank Parties has been creating invitations and stationery for almost 11 years. Over the years we have used and collected countless spools of ribbon so finding storage solutions is important. Here is how I store my ribbon…
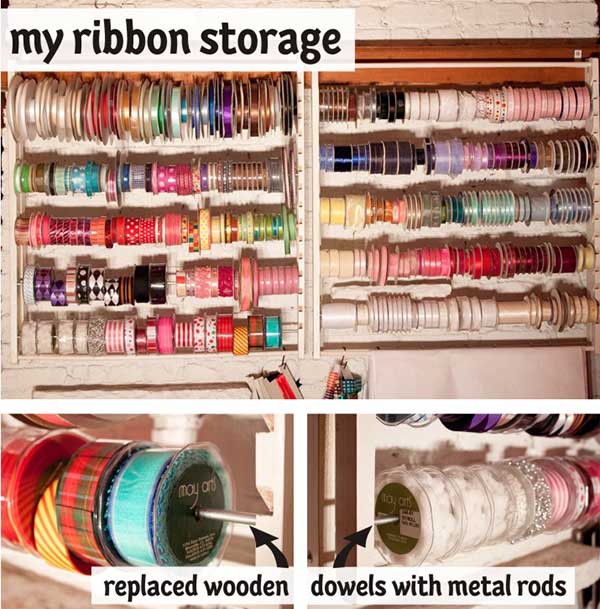
As you can see, I have a LOT of ribbon but when you design invitations and partyware you need a lot of options. About 8 years ago, I purchased two gift wrapping stations to store all of our ribbon stock on. I needed to be able to see all the ribbon I had so I knew my available options and to prevent purchasing duplicate ribbon. It came with wooden dowels which I replaced with metal rods to carry the weight of the ribbon spools. I purchased the rods at the hardware store and cut them down to size with a hacksaw.
I know most crafters cannot dedicate an entire wall to ribbon storage so I researched options and came up with a few simple ideas for storing all of your May Arts ribbons!
Idea 1:
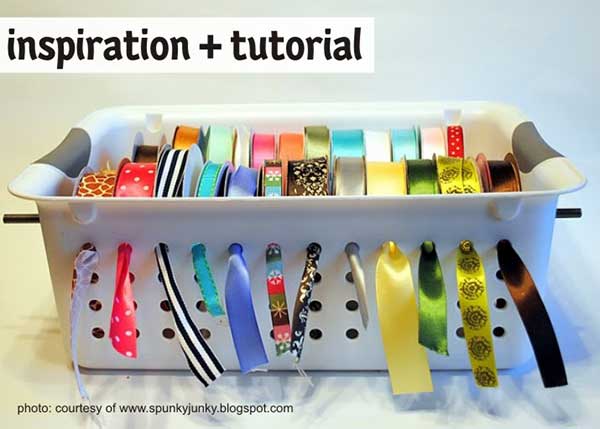
I found a great tutorial by Halsey of Spunky Junky. She created this option for $5…
Gather the following supplies:
- May Arts Ribbon Spools
- Storage Basket with Holes
- Wooden Dowel or Metal Rod
- Scissors, Craft Knife or Hacksaw
Ready? Here we go…
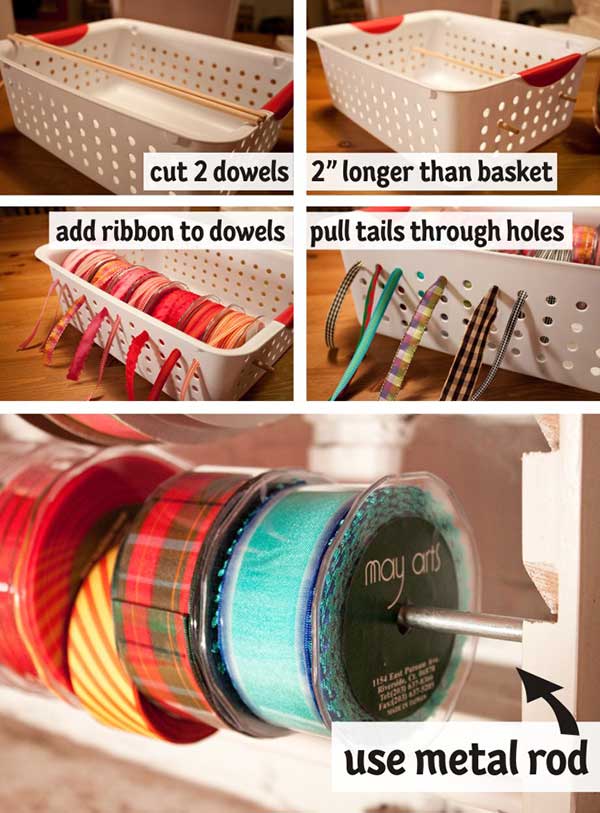
1. Be sure that your dowels or rods can easily slide through the basket holes. I used a ¼” dowel.
2. Cut 2 dowels or rods 2” longer than the length of the basket.
3. Thread dowel or rod through the basket and ribbon spools.
4. Pull ribbon tails through holes. Ta-Da!
Idea 2:
I searched and searched for a gift wrapping station like the one I have but found nothing! I did find an alternative by Kate of Centsational Girl.
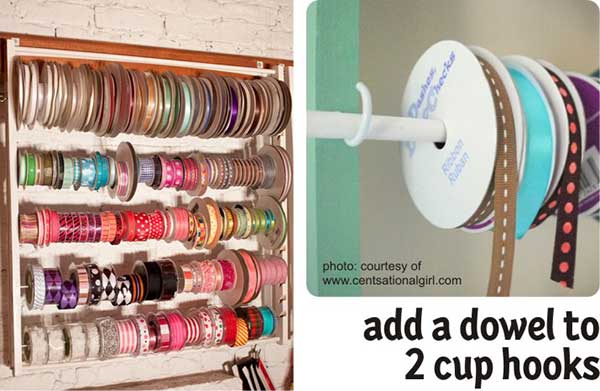
Kate added simple cup hooks to a wood frame and added a dowel. Not too handy with power tools? Screw the cup hooks into a substantial wooden picture frame or bookcase you pick up at a yard sale.
Idea 3:
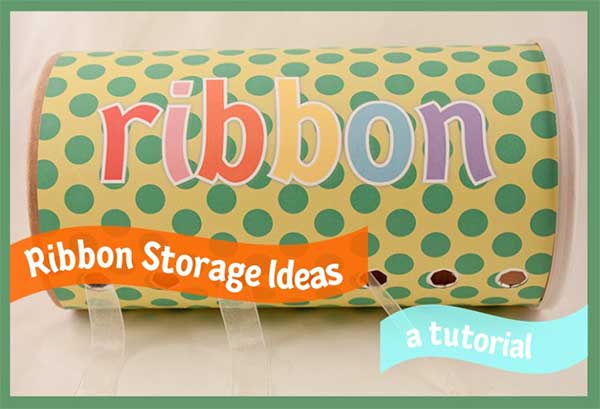
I, of course, wanted to come up with a penny pinching option from things I had around the house. I was inspired by a breakfast favorite—an oatmeal container.
Gather the following supplies:
- May Arts Ribbon
- Clean Large Oatmeal Container
- Hole Punches
- Ruler
- Pencil
- Craft Knife
- Adhesive
- Scrap Cardstock
- Paper
- Optional:Stickers
Ready? Here we go…
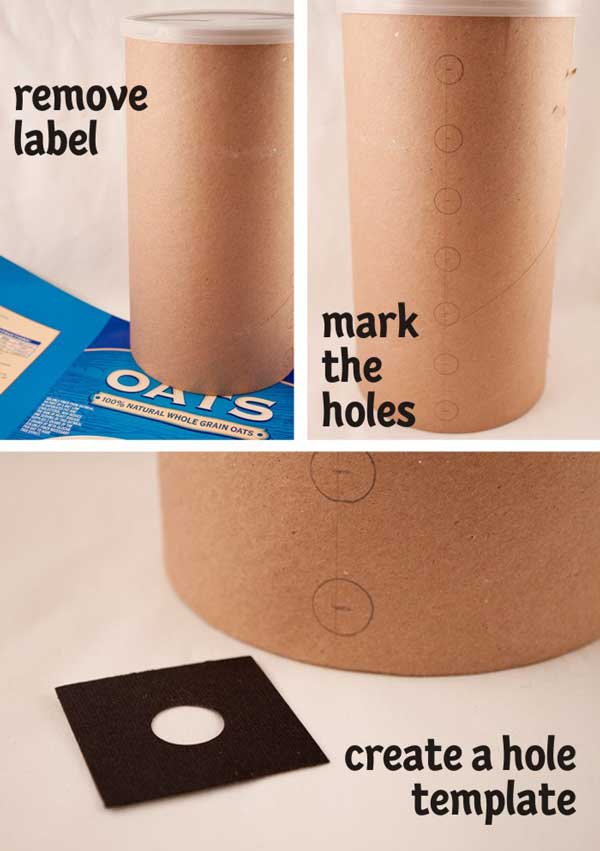
1. Remove the label from the oatmeal container.
2. Use the ruler and pencil to evenly space and mark the holes for the ribbon tails.
3. Create a template for the holes by punching a circle from a scrap piece of cardstock.
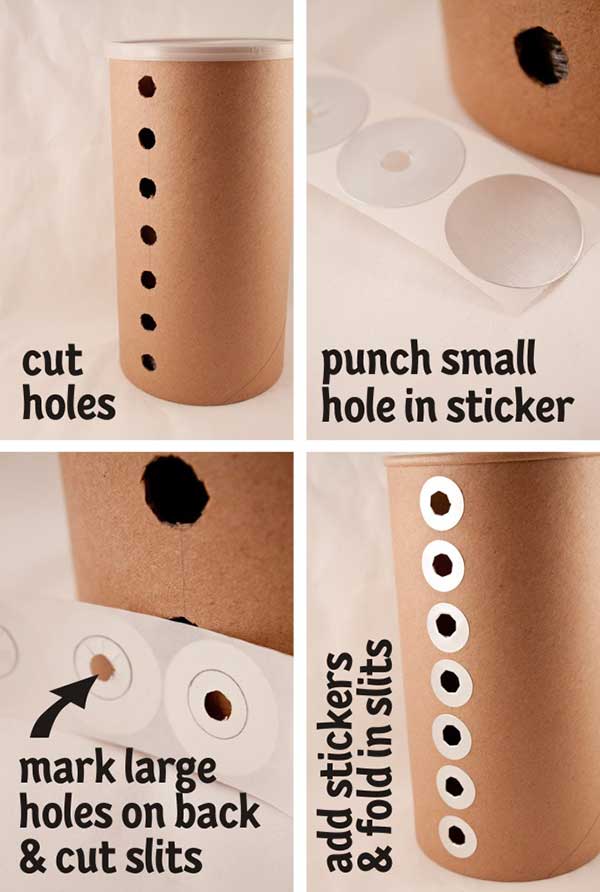
4. Cut out the holes using a craft knife.
5. Optional: To give the holes a more finished look, punch small holes in round stickers. Flip the sticker over and trace the large hole on the back. Cut slits from the small hole to the large hole. Attach the sticker to the exterior of the oatmeal container and fold in the slits. Take additional stickers and punch a large hole in the center. Attach these to the inside of the container.
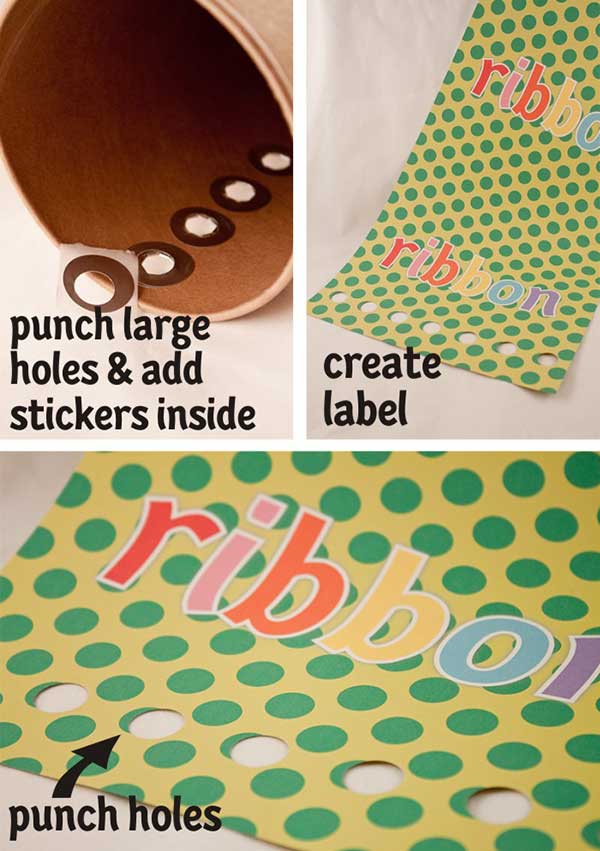
6. Create a label using the oatmeal container’s label as a pattern. I printed a design on two sheets of paper and attached them together with an adhesive roller. Mark your paper with the holes pattern, punch the holes and attach your label.
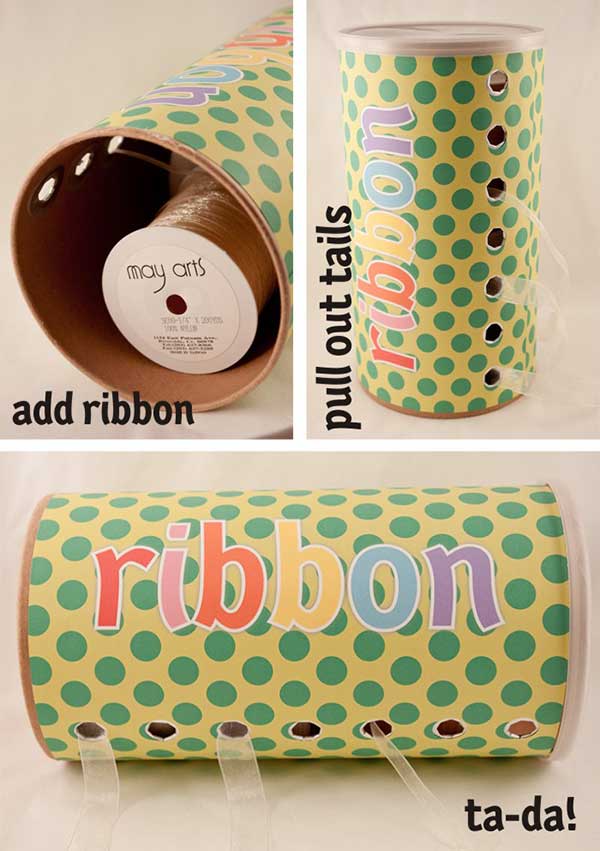
7. Add your May Arts ribbon spools, thread the tails through the holes and Ta-Da!
I hope you’re inspired to create simple ribbon storage options for your May Arts ribbon. To help you with decorating your own oatmeal container, we have included a Free Download for you!
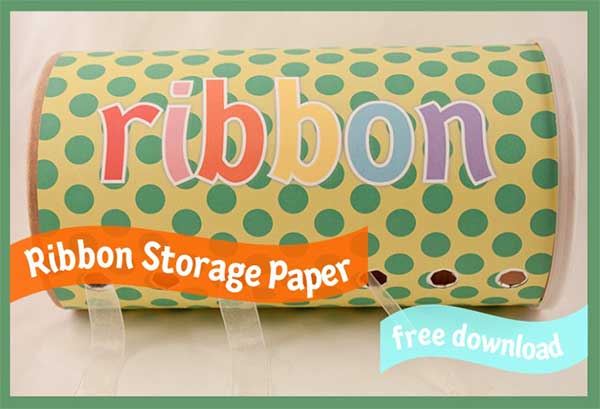 {Free Download} Ribbon Storage Paper
Sources:
Lots of Ribbon by May Arts
Ribbon Storage Paper by Piggy Bank Parties
Blog Post By: Doris Driver

