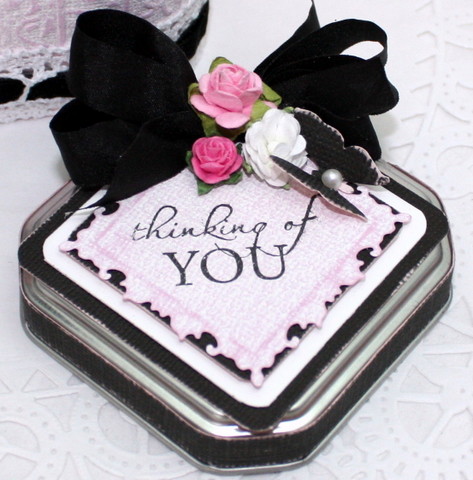
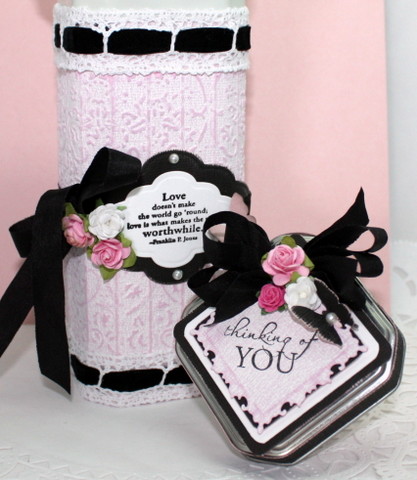
Creating Thrifty Gifting – Altered Tin
Charlene here welcoming you back to the May Arts blog for another fun blog week featuring the fabulous products from Core’dinations and May Arts Ribbon! Be sure to check back every day for inspiring projects from some of the other May Arts Design Team and check out the Core’dinations Blog for even more crafty goodness.
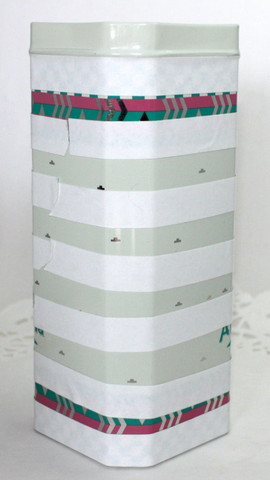
Today, we’re going to turn this:
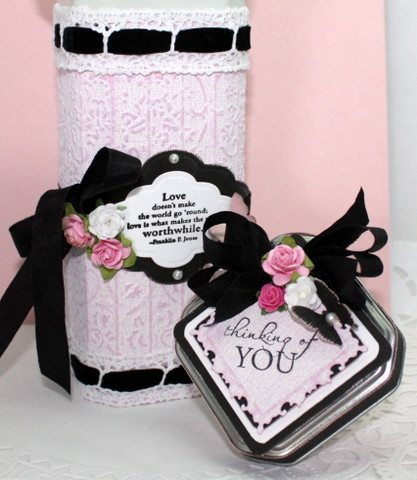
into this:
with the help of Core’dinatons and May Arts Ribbon!
Here’s your supply list:
- Empty tin
- Core’dinations Whitewash Collection (Antique Vanity)
- Core’dinations Black Magic Collection (Hex)
- Core’dinations Sand It Gadget
- Core’dinations Dust Buddy
- May Arts 7/8” Crochet white
- May Arts 3/8” Woven Velvet Black
- May Arts ½ “ Solid Wrinkled Black
- Scor-Pal
- Other supplies: Scrap white cardstock; Embossing folder; Spellbinders Labels 6, Fleur de Lis, Square dies; Strong double sided tape; Paper roses; stick on pearls; Martha Stewart buttefly punch; Sentiment stamps (Rubbernecker Stamps “Thinking of You”; Heidi Grace Love Quote); Versafine black ink; Glue dots; foam tape
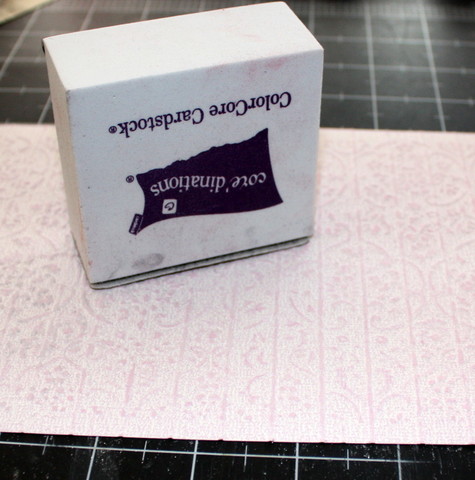
- Cut Core’dinations Whitewash cardstock to fit around your container. Emboss. (I had to run mine through the Big Shot 2 1/2X to cover the entire piece. Score a vertical line every ½ inch. Sand with Core’dinations Sand It Gadget (love this! Saves time and fingernails) until your desired effect is achieved.
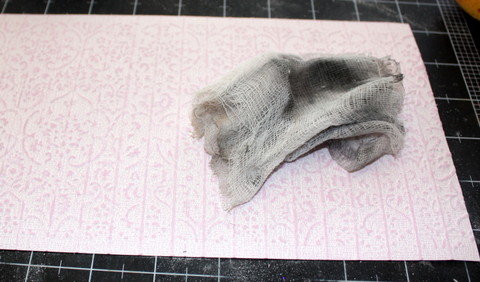
Clean up the dust (like magic!) by swiping the Dust Buddy over the embossed cardstock and your work area.
Don’t worry the mess stays on the Dust Buddy! Told you it was magic!
Run the strong double sided tape around the tin. Make sure to get the tape close to the top and bottom edges. Press down securely, then remove the paper backing and attach the Core’dinations cardstock.
- Apply strong double sided tape to the top and bottom edges of the covered tin. Measure the May Arts Crochet and Velvet ribbon to fit around the tin. Thread the velvet ribbon through the crochet ribbon. Attach to the tin over the double sided tape.
- Die cut Core’dinations Black Magic cardstock and the white scrap cardstock with the label dies. Lightly sand the edges of the Black Magic cardstock to reveal a bit of the pink underside. Use hole punch to punch holes in the ends of the die cut. Stamp sentiment on white die cut. Attach to black label with double sided tape.
- Thread May Arts ½ inch Solid Wrinkled ribbon through the holes in the Black Magic label die cut. Wrap around the tin. Tie in a bow. Embellish with paper roses, pearls. Punch butterfly from Core’dinations Whitewash cardstock. Sponge edges lightly with black ink. Attach to tin with glue dot.
- Cut a strip of Black Magic cardstock to fit around the lid of the tin. Sand lightly. Attach to tin with strong double sided tape. Die square shapes to fit the lid from Black Magic, white cardstocks. Die cut Fleur de Lis shape from Whitewash cardstock. Lightly sand the edges of the Black Magic Cardstock. Layer the largest black square with a white square. Stamp sentiment on the Fleur de Lis shape. Attach to a same size Black Magic square. Attach to larger squares with foam tape. Embellish with a Solid Wrinkled Ribbon bow, paper roses and a Black Magic Butterfly. Attach to tin lid with strong double sided tape.
Now fill it with a gift card, some elegant chocolates or jewelry and you have a gift fit for a queen, a special mom or a bride to be.
You can find a Printable Tutorial here.
Blog post by: Charlene Driggs


