It’s New Release Week here on the May Arts Ribbon Blog! And that means all week long we are inspiring you to create with our awesome new ribbons. That also means you have two chances to win some of your own! Our first giveaway is our Spring Release Giveaway, showing you all our upcoming releases. And for another chance to win, you just have to comment on any post this week!
Now, without further delay, here is another healthy dose of ribbony inspiration with Royal Ribbonista Charlene Driggs:
The beginning of the new year means exciting new ribbons in stock at May Arts!
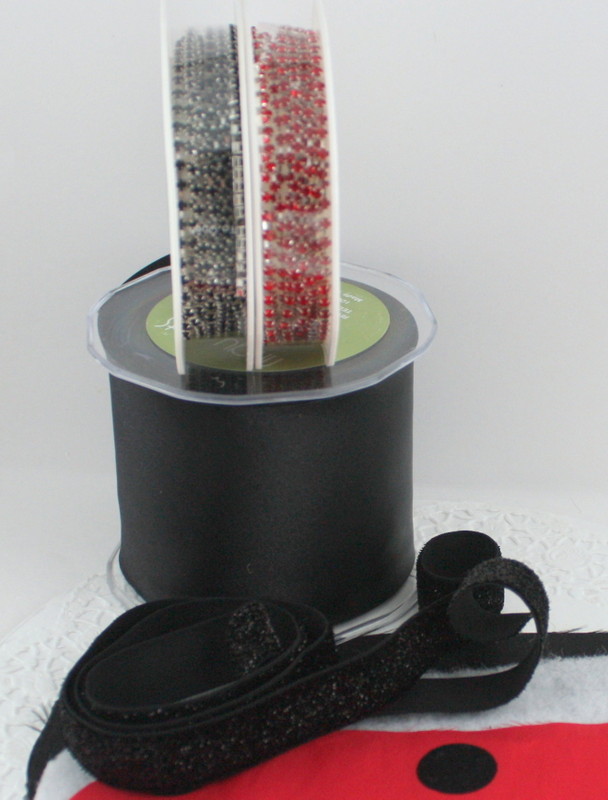
As soon as I saw the gorgeous Diamond Chain and the elegant Glitter Elastic (I see lots of sparkly headbands in my future!), I knew what I wanted to create.
I’m one of those people who can’t sleep unless all light is blocked out so I love sleep masks, especially when traveling. Unfortunately, the ones you can buy tend to be a bit ho hum and very often the elastic is super uncomfortable.
May Arts Ribbon has solved that problem…beautifully!

It only took about an hour and a half to make this little beauty and if you’re a sewer, you can make this with less than a quarter yard of scrap fabrics you probably have in your stash. All pieces need to be approximately 5” x 9”.
Here’s what you’ll need:
- Pattern for your mask (there are lots of free patterns online some bigger, some smaller so you can choose what you like best.)
- Fabric for the outside of your mask Satin for the inside of the mask
- Lightweight poly batting
- 22 inches of Bias Tape Piping
- Sewing machine, thread, ruler, fabric marker, zipper foot, needle
- May Arts Ribbon
Instructions:
Print and cut out your chosen pattern. Cut one each of the top fabrics, poly batting and satin lining.

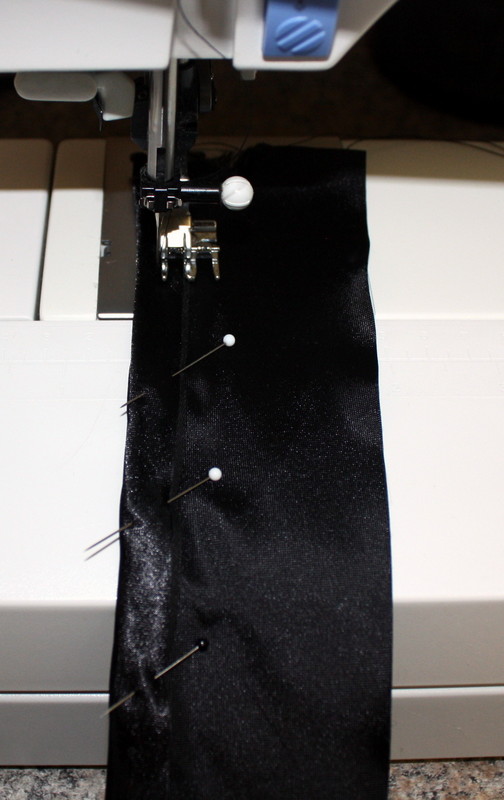
I had some plain black piping in my stash but it wasn’t pretty enough to match my fabric so I covered it with May Arts Bias Cut Satin ribbon. I just used a zipper foot to sew right against the seam of the piping then cut off the excess ribbon even with the edge of the piping.

Pin the piping to the right side of the front fabric clipping around the corners so it will lie flat. Stitch close to the edge of the piping. I basically used the zipper foot for the entire construction of the mask. Mark and pin the Glitter Elastic to the mask then baste stitch.
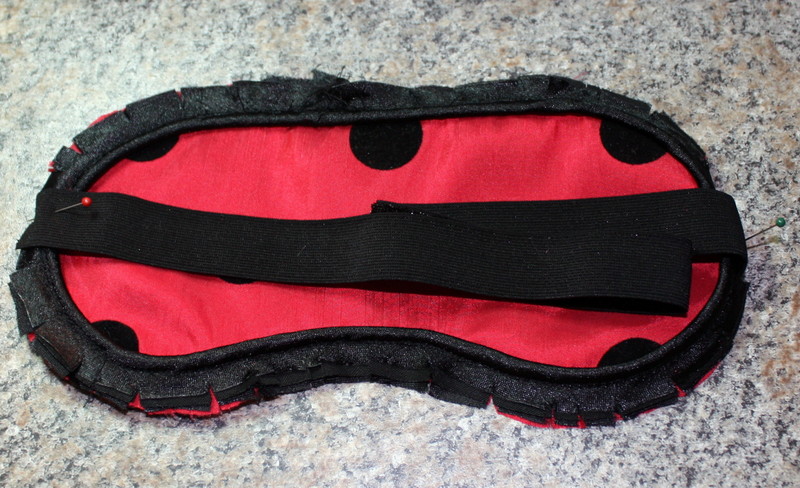
Prepare the mask for sewing by layering first, the batting, then the satin and finally the front fabric as shown. You may want to pin the excess elastic to the center of the front to keep it out of the way. Use lots of pins to keep the pieces in place.
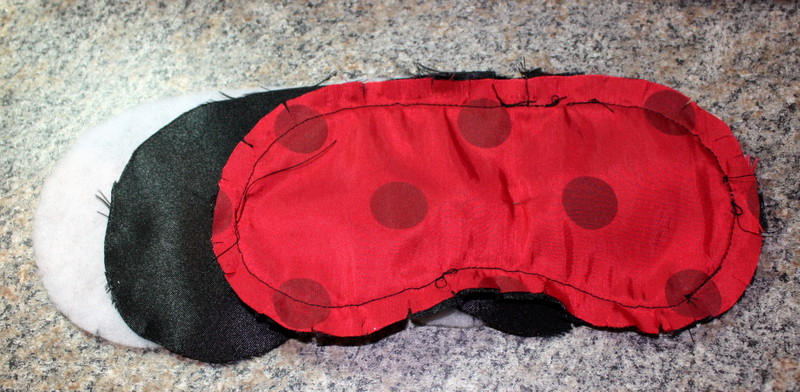
Stitch around the edges according to your pattern’s measurements, leaving a two inch opening at the top edge for turning.
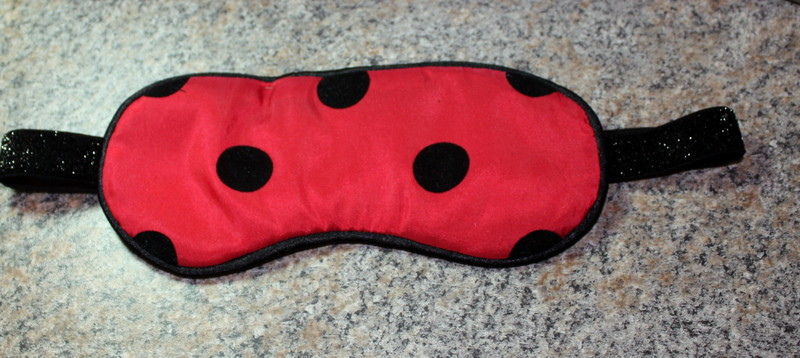
Trim the seams then turn the mask right side out.

Press flat, if needed. Hand stitch the opening closed. It would have been fine just like this but I decided to “punch it up a notch” in the glamor department with May Arts Diamond Chain.
I hand stitched the Diamond Chain to the front using small stitches in the cording seam.


I decided this one was gift worthy so I created a card to go with it. See that gorgeous satin scroll ribbon on my card? It’s self-adhesive! LOVE!

I added a strip to the inside as well.

and to the envelope…I used the rest of my yard of Glitter Elastic to make a band for the clear box. I just machine stitched the ends then stretched it over the box.

I think this would make an adorable wedding shower, Valentine or birthday gift.
Thanks for joining us on the May Arts Blog!
By Charlene Driggs
Don’t Forget! There are 2 chances to win some new releases this week: here and on our sneak peek!
Partners in Craft Supplies Used:
- Tombow Stamp Runner
Other Supplies (card and box)
- Handmade flower
- Pearl spray
- Glue dots
- Cardstock/designer paper

Wow! I am not much of a sewer, but this is a great tutorial, I could probably make this! I love your set-it’s Sew pretty!
What a fun gift! That new trim really makes it special!
How cute, wouldn’t it be perfect for a kid’s party, like pin the tail –make it pin the ladybug on the flower maybe???
Who says you can’t look pretty while you sleep? Love the bling too. I need to make one for my sister. She uses these every night! This is a must have!! Thanks for sharing 🙂
Such a fancy mask! Love the diamond chain detail. Lovely matching card too!
I love this as a gift idea with the matching card! Wish I knew how to sew 🙁
So awesome!! I need to make one of these for my husband. He needs total darkness to sleep.
Wow such an elegant sleep mask and gorgeous card. Who wouldn’t want to receive this as a gift! Thank you for sharing the tutorial – this is one I need to try too. I love that self-adhesive scroll ribbon and diamond chain.
How creative! What a fun idea!!
I like it! I would love a more masuline one for my husband. I’m not a sewer but maybe could just glue it. have any ideas?
stamping sue
https://stampingsueinconnecticut.blogspot.com/
Cool idea!
So classy!! I am going to be making a few of these for friends, family and of course myself!!! Thank you for the inspiration!
wonderful projects to showcase the new may arts ribbon, well done team
Love the bling. Looks like a ladybug!
Ohhhhhhhhhhhh, how girly and romantic. I need to make one of these for myself and some girlfriends. Thanks, May Arts!
what a fun project… oh so many beautiful new ribbons and embellies!!! yummy
Hey that is a wonderful
gift idea. Love the choice
of colors.
Carla from Utah
Very pretty! Lovin’ that Diamond Chain!!!
I like the final touch of the rhinestones.
This is so cool and a wonderful idea.
Charlene your Sleep Mask is so pretty, practical, and feminine. Tell me you made one for yourself also (besides giving this one away )? I Love it! As one who requires “mole like conditions” to sleep, my Husband’s words, I appreciate your creativity and ingenuity.
what an amazing project, I love it!!! my sister would love it.
very practical and very pretty. When you need a sleep mask you want something that will work as well as make you look good. Great job.
The sleep mask would make the cutest gift for my sister.
Very fancy sleep mask and nice gift presentation.
Cool! I need one of these.
How pretty! I’m afraid that if I had something as cute as this, my oldest daughter (maybe my baby too) will think about swiping it from mom! I love that diamond chain & it’s amazing how many uses you can find to put satin ribbon on! Love this idea, thank you for sharing! If I’m adventurous enough, I’ll take out my janome mini sewing machine & try to make this project as it seems pretty fun & easy to do (looks easy, hopefully it will be! Lol) I’m just a tad intimidated by my sewing machine but I know I should just practice & play & what better project to try! Cross your fingers for me. 🙂
WOW wow WOW
Your sleepmask looks SO PRETTY and COMFY too Charlene!!!
LOVE the addition of the sparkly diamond chain and LOVE the thought of nodding off with the smooth comfort of satin, with pretty bling to help bring sweet dreams – thank you for the inspiration and tutorial!!!
Such an ELEGANT card {inside & out) and BEAUTIFUL gift set – someone is going to be very lucky!!! Diamond Chain was already high on my wishlist, now I have added the self adhesive Scroll Ribbon & Jumbo Leaves too 🙂